If you missed part one of our series on building a custom fishing rod, be sure to check out The Artful Angler Part One: Custom Fishing Rod Parameters & Parabolics.
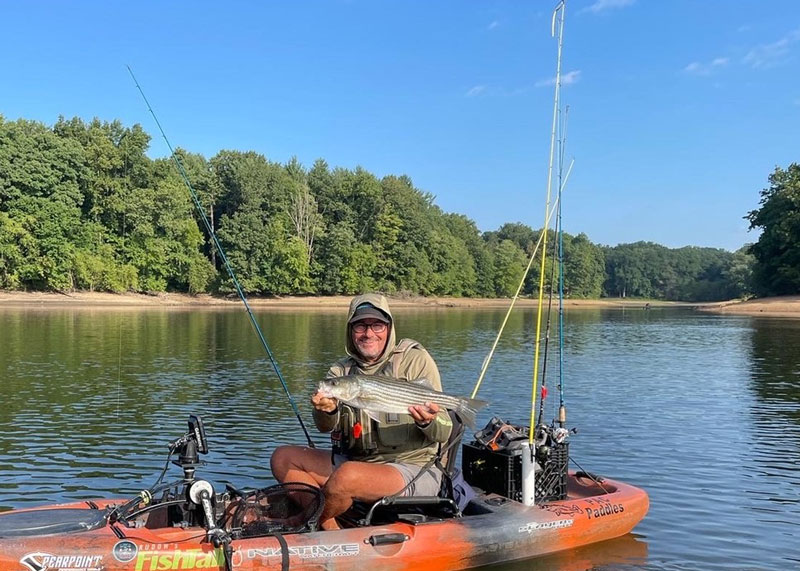
I’ve bought plenty of fishing rods over the years. Some turn out to be good, some great, and some just plain meh. None had my own personal touch. I had the opportunity to build my own custom fishing rod to my own personal specifications when Lenny Rudow, the Angler-in-Chief, reached out and asked if I would like to “embark on a new adventure.” I didn’t hesitate.
After thinking about it I chose to build an inshore rod. I logged on to the Anglers Resources website, decided on the seven-foot Point Blank Katana medium-fast action blank. I then chose Fuji K-Series single foot Alconite guides and a Fuji graphite seat/handle. A few days later a cardboard tube showed up on my doorstep. I opened it and removed the contents, then started to get a few butterflies in my stomach and some choice words went running through my head. It had been years since I had worked on piecing rods together from various parts. I grew up in a military family, traveling every few years to a new duty station. My twin brother Steve and I fished every chance we could in the Missouri River, Alabama farm ponds, Indiana streams, and more, but we didn’t have much, so we had to repair and build our own lures and fishing rods. That was a long, long time ago.
The first thing I did was scan the internet for rod building information and videos. To my surprise, I found more than enough “How to Build a Rod 101” videos and articles. The Learn tab at Anglers Resource is a great place to start. Their Builder Resources includes articles and videos detailing everything from picking components to making specific types of thread wraps, and the GPS Calculator can help map out guide placement using Fuji’s proven New Guide Concept and KR Concept spacing systems. You’ll also need some specialized tools to start the rod building endeavor. I used a Mud Hole Core Rod Building Start-Up Kit, which included everything I needed to start building rods: a hand wrapper, drying motor, finish, epoxy, tip adhesive, three reamers, a thread burnishing tool, guide tubing, an alcohol burner, razor blades, a China marker, three spools of thread, mixing cups with stirs and brushes, and a Rodbuilding 101 guide. Also be sure to check out What Rod Making Supplies do Beginners Really Need.
I took a deep breath and laid out all the rod components on the counter. There were 19 pieces in front of me that needed to become one: the blank, five separate pieces for the reel seat and handle, and 11 guides.

Before assembling anything, you need to find where the blank wants to naturally bend along its backbone, called the spine. Place the butt end of your blank on a firm surface, put one hand near the tip, then put your other hand mid-rod and apply firm pressure. With the rod under load use your hand in the mid-rod region to roll it, and feel for the spine. If you continue to roll the blank you may find that it has yet another spine. The blank I used had two, on the exact opposite sides of the rod. You’ll want to build on the firmer of the two; mark where the spine is located so you know where to line up your reel seat and guides when you get started.
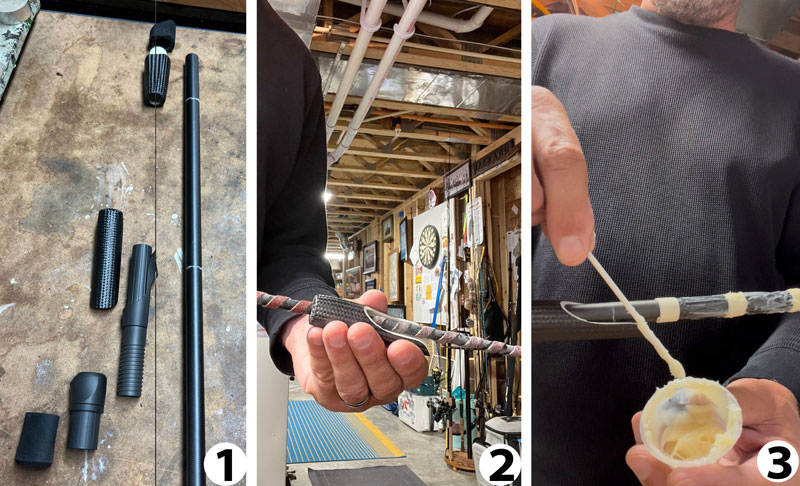
Next you need to fit the grips and reel seat. This process varies depending on the type and style of rod you’re building, but the basics are the same. You’ll have to lay out and mark where the butt grip, reel seat, and forward grip will go, then ream out the grip pieces to fit the blank’s diameter starting with the back ends to compensate for the taper of the blank. Ream a little, slide the pieces onto the blank to see how close they are to fitting, pull them back off, and repeat the process using the next larger reamer until the grips match the marks you laid out. Take your time, use caution to prevent damaging any of the parts, and check the inside of the grips after reaming each time to make sure that there isn’t any dust or grit that may scratch the blank when checking the fit. This was probably the most time-consuming part of my build.
Now it’s time to epoxy the butt end of the grip in place. Mix the resin and hardener, apply the epoxy up to the mark you made, and slide the butt end of the grip on. Clean any epoxy residue with a paper towel and some isopropyl alcohol.
You’ll need to build arbors to support the seat. Do this by wrapping masking tape around the blank about half an inch up from the rear grip (or if you have a split grip handle the arbor will be half an inch up from the mark you made on the blank during layout). You will then place an arbor half an inch down on the reel seat mark and another between the two. Now put epoxy over the area and slide the seat in place, being sure you have it aligned and oriented correctly along the rod’s spine. Then add the foregrip, and with all the handle pieces in place, let the epoxy fully harden.
Ready to move on to the installation of the guides? First take a small file and file the top of the foot of each guide until it’s smooth. Be sure to check for burs on the underside of the foot and if you find any, file them down so they don’t scratch the blank.
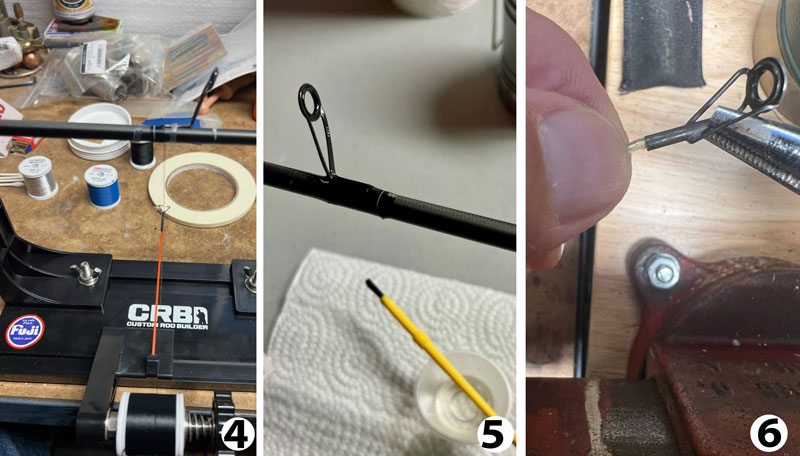
I used Fuji Alconite single-foot guides and Fuji has a chart that gives you the distance between them, so determining where to place the guides was easy. You may need to look up the specifications for various types of guides, they may come with the measurements, or you may be able to use the GPS Calculator, depending on the rod and guides you’ve chosen. Use the China marker to mark where the guides will go, then attach the guides to the blank temporarily while wrapping. You can use masking tape, guide bands, or guide foot adhesive. I used guide bands and masking tape. I was also very careful to line up the guide ring (not the foot) with the spacing marks and along the spine mark.
The next step is to wrap each guide. This is a multi-step process which I repeated nine times for nine guides, and it became easier with each wrap. It’s a fairly easy process, but you need to have a hand wrapper to provide stability and tension as you wrap the thread on the blank and over the foot of the guide. I suggest viewing a video on the process before you begin wrapping.
The tip top guide will be glued in place. Place a sliver of tip adhesive into the tube of the tip top while holding it with a pair of pliers. Be sure not to hold the tip top by the guide ring or you might damage the ceramic insert. Then heat the tip top up with a lighter to melt the adhesive and slide it over the end of the blank, twisting it as you push until it lines up with the other guides.
Now it’s time to apply multiple thin coats of epoxy to the guide wraps. It’s a two-part epoxy that you mix in a small mixing cup, then apply with a brush as the blank is rotating in the rod dryer. Follow the instructions that come with the epoxy to be sure that you get the correct mix and that it’s free of bubbles. Then you’ll need to introduce some heat. I used a butane lighter to lightly apply flashes of heat, helping eliminate bubbles and leveling out the finish. The rod will remain on the rod dryer for 24 hours—torturous hours, because the crafting is complete but you still can’t go fishing just yet. After making repeated trips back to the workbench to admire your work and fighting the urge to take a cast with that new rod, you can finally take it off the dryer after 24 hours. Place your favorite reel in the seat, get out there—take the first cast.
Tune in next month for Part III: The Devil’s in the Details. Eric will share how he gave his custom rod some cool unique finishing touches that turn an angling tool into a work of art.