Wherever along the Chesapeake Bay your fishing grounds are located, one thing is for sure: catching flounder in the Bay is a ton of fun. Some years you’ll encounter plenty of these flatfish as far north as Eastern Bay, and others the best bite is from Solomons Island south. Back in the early 2000s they were plentiful in northern waters but for the last decade or so the flounder fishing has been far better in Virginia's portion of the Chesapeake. This remains true, however, in 2023 and 2024 the flounder bite improved as far up the Bay as Calvert Cliffs, so it seems that northern areas may be on the upswing. Wherever and however you choose to target these fish, the net result of a successful day is some of the best tasting fillets on the face of the planet. Ready to go after those doormats? Let’s look at each technique in detail.
Drift Fishing for Flounder
For many anglers flounder fishing means drifting around with baited rigs. A chartreuse, white, or yellow Fluke Killer rig (a hair skirt with a beaded spinner or a spin-n-glow in front), weighted with an ounce or two of lead, is the standard floundering tactic. It gets baited up with a bull minnow, a squid strip, or the classic flounder “sandwich,” a combination of these two baits on the same hook. Large silversides also make good baits, as do strips of a flounder’s white under-belly.
Recently, anglers drifting top-and-bottom Fluke Killer rigs along near-shore wrecks and reef sites in the Atlantic have had the best success by baiting up with six-inch GULP Swimming Mullet. Yes, this does work in the Bay as well. Fluke Killer rigs in general don’t quite rule the roost in the confines of the Chesapeake as they do in the open ocean, however. This rigging style allows the use of gobs of weight which works well in the ocean, but in the shallower waters of the Bay, in many cases jigging and/or trolling will fill the box faster. That said, the Fluke Killer should never be under-rated because of one simple trait: it’s easy to use. The least-experienced anglers among us can simply tie one on, bait it up, and have a good shot at hooking into flatfish. Not so, with the other techniques we’re going to examine.
Once you have a baited Fluke Killer on the end of your line, the next item of importance is boat positioning. Flounder don’t lie around just anywhere on the bottom. Like other species, they favor structure and especially sharp drop-offs. So you need to position your boat for a drift that takes you across a steep drop, until you get a few bites and can pinpoint the specific depth the flounder are congregating at. Although these fish will be found at times in ankle-deep water and at other times in 60 or 70 feet of water and beyond, during most of the season the bulk of the fish in the Bay will be somewhere between 10 and 30 feet of water. Look for sharp drops in this range, and focus your efforts there.
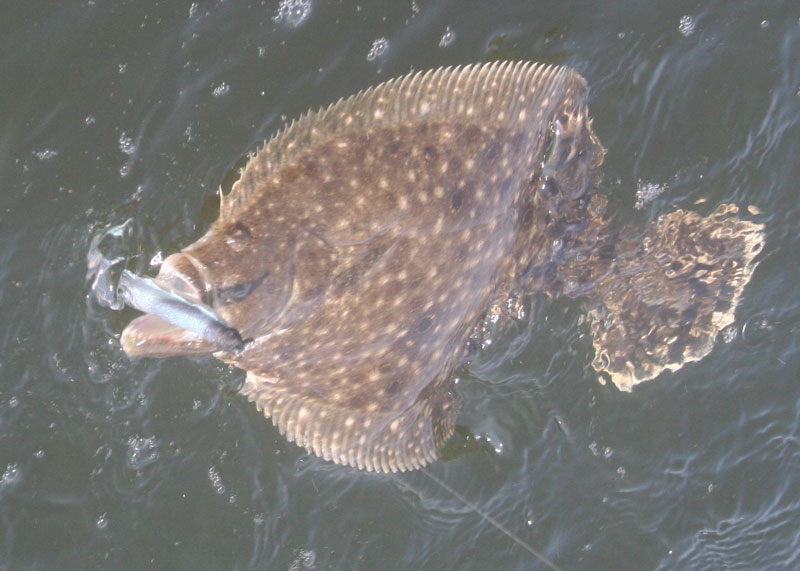
One critical thing about drift fishing with a Fluke Killer: never, ever, ever set the hook on the initial nibble. Flounder will almost always grab and kill their prey before swallowing it. When fishing with bait, that means you’ll feel a jiggle-jiggle at first. The jiggle-jiggle is the flounder chomping down on the minnow and shaking its head, similar to the way a dog would shake its head to stun or kill small prey in its mouth. Set the hook on the jiggle, and you’ll usually miss the fish. Instead, wait for a thump-thump-thump feeling. This will come after the flounder has taken the bait all the way into its mouth and is swimming away—now’s the time to cross its eyes.
Jigging for Flounder
Jigging, even though it’s employed by fewer flounder anglers, is incredibly effective and has been becoming more and more popular among serious flounder-pounders the past few years. Added Bonus: You’ll catch plenty of stripers, bluefish, and other species when fishing this way. Some like jigging with bucktails and others favor a straight jig-head and tail, but in either case, when it comes to dressing the hook a GULP tail is usually the top pick. A five-inch chartreuse or white GULP! Jerk Shad is a top flounder jigging lure. Hop them along the bottom as you drift, and don’t be afraid to give them plenty of action. Flounder aren’t nearly as sedentary as most people imagine them to be, and they often chase a lure for quite a while before actually attacking it. A vigorous jigging action often triggers that attack.
When jigging for flounder it’s also very important to use a rod with a fast-action tip, to have your reel spooled with braid line, and to sweep your rod tip up firmly after the jig touches bottom. The vast majority of the time, flounder will strike your lure as it’s sinking and is just an inch or two above bottom. As a result, quite often you won’t even know the fish has struck—until you begin sweeping the rod tip up again for the next sweep. It’ll feel more or less like you’ve hooked bottom, and your jigging motion’s up-swing will become the de-facto hook-set. The combination of a fast tip, no stretch in your line, and a firm up-swing combine to ensure a solid hook-set in this scenario.
Yes, this is quite different from using the Fluke Killer, when you’d want to wait for that thump-thump-thump feeling before setting the hook. But with a jig you need that hook-set to be instantaneous. And if you feel the jig pull free instead of solidly hooking up, immediately drop it back to the bottom and start jigging again. Quite often a flounder will hit a jig multiple times, until it feels the sting of the hook.
Trolling for Flounder
Trolling commonly requires much heavier gear than these other tactics, paired with very heavy weights. In some cases, 10 or 12 ounces of lead may be necessary to keep your lures right on bottom. Braid or even wire line will help reduce the amount of weight necessary. You’ll also encounter more snags and break-offs while trolling. Those are the down-sides. The up-side? Particularly in deep water with strong current (such as what you’ll find at the mouth of the Chesapeake at the CBBT), jiggers and drifters may have difficulty holding bottom, and trolling often becomes the most effective way to target these fish.
Again, you’ll want to work drop-offs. Constantly let out or bring in line as necessary as you go up and down those drops, to keep your rigs right on bottom. And again, GULP tails are often recognized as the top dressing for your bucktails and jig heads (though some old-timers will still insist that nothing beats a fat bull minnow). Common rigging includes a 15’ leader of 30 pound test run behind a sinker on a three-foot dropper, with a one-half to one-ounce bucktail on the end. Generally speaking you’ll want to keep your trolling speed to a minimum, and bounce those lures across the bottom. Adding a bit of jigging action to your rods will help generate more bites, too.
When trolling in deep areas with lots of current, remember to use the boat to your advantage. You can troll with, against, or across the current to help control the action and depths of your lures and/or baits. If you begin to drag bottom while trolling cross-current, for example, a quick turn into the current will lift the rigs ever so slightly. Real sharpies, in fact, will often zig-zag to keep their offerings bouncing right along the bottom.
FLOUNDER FISHING TIPS:
- These fish are sight-feeders which hit best when the water’s clear and there’s plenty of bright sunlight. In fact, if you can time your trip to coincide with calm weather and bright mid-day sun, you’ll boost your success rate. On the flip side, dark, cloudy days may be better spent in pursuit of stripers, blues, or other fish. And when hard rains or steady winds churn the water up, flounder fishing is likely to be slow.
- When you get a flounder up to the boat, never lift its head out of the water before a net’s under the fish. Quite often, when you raise their head into the air they give it a violent shake—and spitting the hook free at this point is a regular occurrence. Allow the fish to keep its head wet, and it won’t give that final shake.
- Remember to adjust your target depth according to the tide. On a high tide flounder usually move up to the shallower portions of a ledge or hump, and during a low tide they commonly go deeper. In both cases the fish in an area do tend to congregate at a similar depth, so when you catch a fish or two continue working close to the same depth range. Then if the bite slows and/or the tide changes, try working up or down the ledge as appropriate (shallower on a rising tide, and deeper on a falling tide).
For more information about catching flounder in different waterways and with different techniques, check out:
- Flat Out Fantastic Flounder Fishing - All about fishing the southern Bay, in areas like the CBBT.
- How to Catch Big Flounder: Doormat Delivery - About searching for monster flounder, in specific.
- Old School Flounder Fishing - Tips for bait fishing for flounder.
- Summer Flounder Fishing Fun - Focusing in on catching flounder in the ocean, at the wrecks and reefs.
- Hampton Halibut: Flounder in the Shallows - About southern Western Shore flounder fishing in the spring.
- Light Tackle Flounder Fishing - For those who enjoy jigging with light tackle.
- How to Fish For Flounder in Delmarva Bays and Inlets - This one covers flounder fishing in bays and inlets along the coast.
Editor's note: This article was originally published in October of 2017 and was last updated in May of 2025.