If you missed the earlier installments of our series on building a custom fishing rod, be sure to check out The Artful Angler Part One: Custom Fishing Rod Parameters & Parabolics, and Part II: Building the Fishing Rod of Your Dreams.
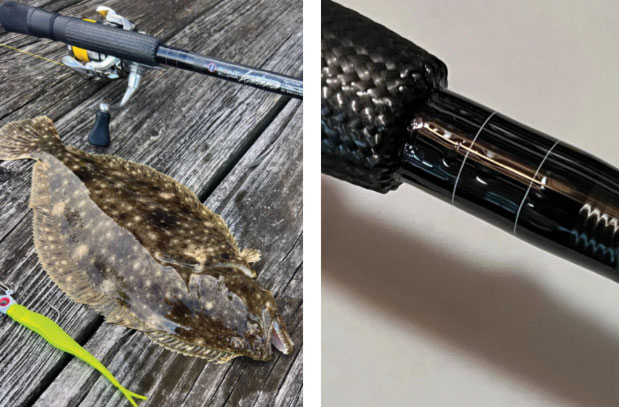
Building a custom fishing rod is satisfying and something to take pride in, and I’m loving my custom piece of fish-catching art. I was a little nervous that the guides would come loose or the handle would twist, but none of that happened. What did happen? My work held up great, I found the rod ideal for the type of fishing I had intended, and I caught fish! I even added a few small details that I’m proud of, and that got me wishing that I had taken the time to do a bit more customizing. So, after besting a few striped bass I started thinking about what I could do to make the rod even better.
Adding decals and/or custom wraps are two options. I bought three fish decals to consider: a redfish, a striper, and a speckled trout. Once I received them in the mail, I thought, what the heck I’ll install all three.
Decorative Decals
To start the installation you need to lay down the decals on the rod blank. In addition to the decal, you’ll need scotch tape or masking tape, your burnishing tool, and a sharp pair of scissors. You may or may not have to trim the decal. If you do need to trim it care should be taken to not touch the image or words on the decal. You don’t want to touch the decal with your hands because oils from your hands can interfere with it adhering properly, and if a fingerprint gets on the face of the decal it will show through the finish once applied. We don’t want that.
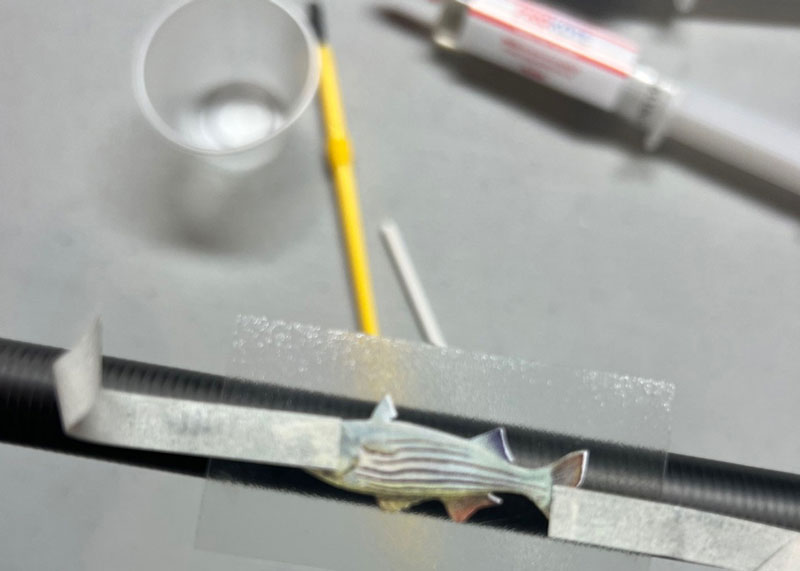
Once you’ve trimmed the decal take a piece of tape that is longer than the decal and touch it to your shirt, arm, or other surface, making it less sticky. You can do this once or twice. Then take the piece of tape and put it over the decal’s clear protective overlay, lightly pushing down to have the viewing side of decal show through. Take a shorter piece of tape and apply it to the backing, then peel it back to remove the backing and expose the sticky side of the decal. You will now have the decal ready to be placed on your rod blank. Before you do so, be sure you have the rod and decal situated exactly as you want. Place the decal in the wrong location or install it crooked, and you won’t be able to peel it back off the rod—you’ll have to start all over again with a new decal.
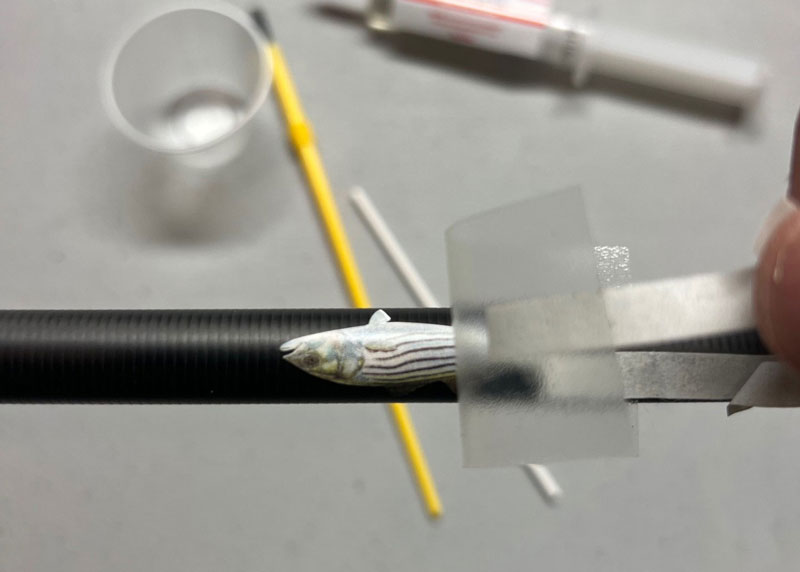
Once it’s in place use your burnishing tool, and starting in the center of the decal, apply pressure and work your way out. Be sure to remove any air bubbles that may be under the decal and take care to prevent wrinkles forming in the decal as well. Once it’s fully pressed onto the rod, grab one end of the scotch tape, and pull at a sharp angle slowly to remove the clear overlay. If you pull the tape straight up it may lift the decal off the rod and we don’t want that. Now the decal is affixed and ready for finish.

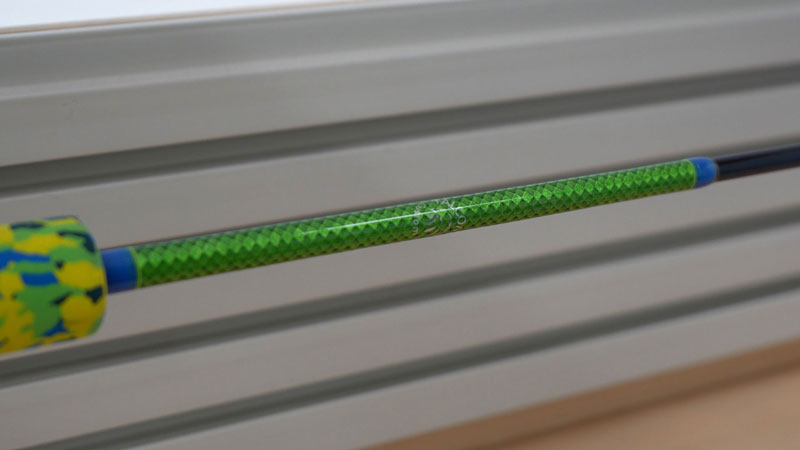
Rapping on Wraps
Next I decided to install single inlay bands in a wrapping. There are a number of ways this can be done, and you can also do this in the original guide wraps to give them a unique look. You can find “how to” tutorials on these and other types of decorative wraps on the Anglers Resource website, by clicking on the “Learn” tab.
Start by cutting a short piece of thread to use as the inlay, about six inches long. I used white thread for my inlay. Take wraps to make it as large as you want then lay the end of the thread on the rod blank, and spin the rod about five turns over the inlay tread. This will lock it down where you want the white thread to be. You can do a single inlay at the start of any wrap, in the middle, or at the end. This is totally your call. After the five wraps over the white thread with the second color, you now want to take white thread and do a single wrap around the rod. Start by going under the second thread (black in my case) and make the wrap, coming back to where it meets itself then back under the black thread while holding it under tension. Then cut off the tag end and continue the wrap to its completion.
So, I assume you are totally confused at the moment—this is a tough process to describe and you really need to see it. But wait, go to the Angler’s Resource Learn section and go to the “Single Turn Inlays and Trim Bands” video. Once you see it demonstrated you’ll know exactly how the process works.
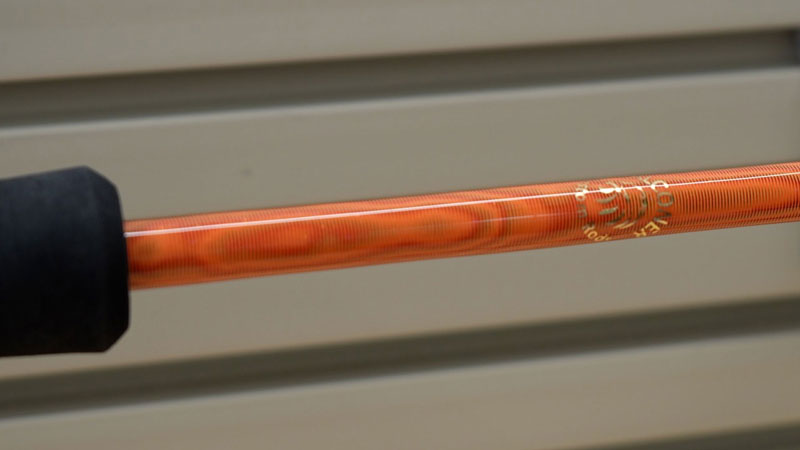
If you are up for it, you can customize your rod further with some wraps including intricate patterns, colors, and designs. Tiger wraps are an interesting thread layering technique which creates an optical illusion of motion by using multiple color threads in close parallel lines. There are under wraps and over wraps with finishes applied partway through the completed wrap. The important thing to remember is that you want to use colors that contrast one another, usually a lighter thread and a darker thread with a metallic or some other prominent colored thread in between.
You’ll start the wrap with all three threads (of the same size) under the same tension or you can start with a “base” wrap of just one color, but that should be the thread that you will use as the final wrap on the overlay of the under wrap. Go slow and be sure that you don’t have any overwraps or gaps during the laydown of the under wrap. Once the under wrap is complete you will then need to apply finish over it. You should put no less than four coats of finish over the wrap. You will need to wait four to six hours between applications or the manufacturer’s requirement. Yes, this project takes time, but it will give depth to your wrap.
Once you have waited the required time after each application of finish and it is completely dry, you can start the next process. It’s time to do the over wrap. You will need to start the wrap in the opposite direction, that is, if the under wrap went from left to right the over wrap will need to go from right to left. You’ll need to start with your base thread, the thread that is to remain. Once you have the base line in place you will cut in the other two sacrificial threads (these will be removed once the wrap is complete) in the same order that you had on your underlay. Make a few simple wraps and tape the loose ends to the blank, then start the wrap with all three threads. Your tension on the threads must be light. They cannot cross each other and need to stay even as you make the wrap.
At the end of the over wrap you will cut loose the two sacrificial threads and make two wraps to hold them in place, then pull them to the side. Continue to wrap the thread that remains and make the tie-off wrap.
Now it’s time to take your burnishing tool and run it across the threads, disrupting the even pattern, which will make “S” curves and wavy movement or rather irregular patterns. You want to do this with as little pressure being applied as possible. Now let it all sit for two or more hours. At the end where you taped the two sacrificial threads take them and start to unwind them, but not by pulling the threads, but rather unwinding them by turning the blank with your other hand. You do not want to move the remaining thread or it will mess up the illusion that you want when the wrap is complete. Once the two sacrificial threads are removed you will apply the finish. Do not apply too much pressure and take care to not get bubbles mixed in. You can also do two-thread Tiger wraps, which have a similar visual effect.
Again, it’s best to lay eyes on this process before trying it. You can find tutorials for how to do this wrap and all those we've talked about at Anglers Resource.
There are diamond and chevron wraps, and dragon scale wraps as well. Dragon scale wraps are a bit more time consuming but have great visual appeal. You can achieve the effect by applying fiberglass mesh tape and then wrapping it with a metallic thread. You can also do a thread base wrap in a diamond pattern then wrap it with a metallic thread. There are more complicated dragon wraps that have intricate under wraps and are covered by gold leaf.
Do a little research before you get started, and check out the visual effect each of these different wraps can have. Get creative—it’s up to you to decide what type of look you want to achieve, and then make it come to life in that new custom rod.
-By Eric Packard