Whether you’re on the Bay or at the beach, as the waters begin to cool off for fall you know that the flounder are going to start feeding. As long as the waters don’t get churned and discolored by a hurricane or a similarly dramatic storm the flounder try their best to fatten up right about now, as they prepare to migrate out to deeper waters off the coast. You also know you want to get after ‘em. The only remaining question: how will you get those fish on the line? Wherever you target flounder one of these three top tactics should do the trick.
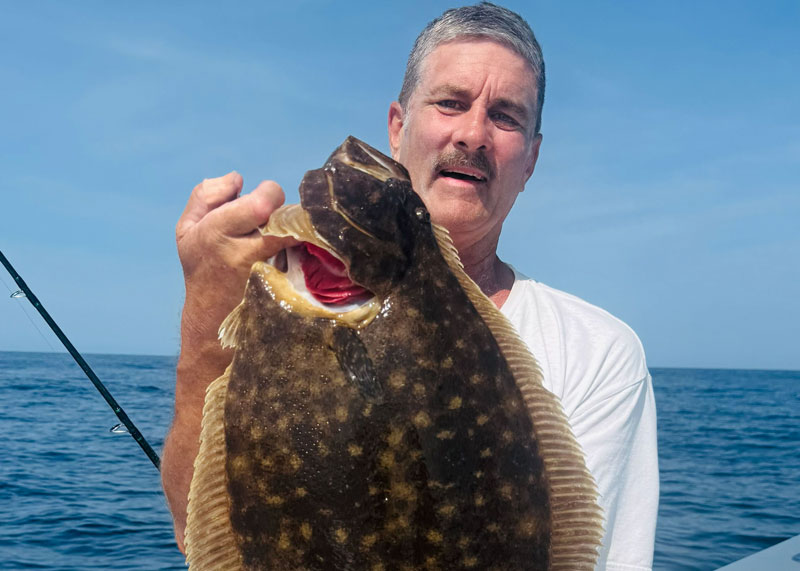
Drifting for Doormats
The Where and the When: You can drift fish for flounder just about anywhere they live. It’s usually the best way to get them in very deep water, especially at the wreck and reef sites off the coast, and is also a top tactic for working channel edges.
The How: This one’s as simple as it gets, people—deploy your rig and let it bounce along bottom. Some anglers like to give it a jig here and there but generally speaking it isn’t necessary because the drift of the boat keeps your offering swimming along.
The What: Top-and-bottom Fluke Killer rigs (with a pair of leaders terminating in a bucktail- or rubber-skirted hook, often accompanied by a spinner or a spin-n-glow teaser) are the top pick. Some anglers prefer using double-bucktail tandem rigs. The classic bait is a squid strip sweetened with a live minnow, but more modern flukers generally slide a four- to six-inch Gulp! Swimming Mullet onto the hook. Note that appropriate rod size will vary quite a bit depending on how much weight you need to hold bottom; in the Bay an ounce or two may be all that’s necessary, but at wreck and reef sites where depth exceeds 100’ you may need eight or 10 ounces of lead (sometimes even more) to keep your rig down.
Jigging for Fluke
The When and Where: Jigging can be extremely productive for flounder when you’re in waters of 25’ or less in calm conditions and 15’ or less in rough conditions or high current. Why the depth cap? Flounder like to smack a bait as it falls, just before it hits bottom, and when you’re using a jig of over an ounce they tend to fall more rapidly than the fish really like it. But when using an ounce or less it’s usually tough to feel bottom in depths and conditions exceeding these, so reserve this tactic for times when conditions allow.
The How: You can cast and retrieve while bouncing your jig along bottom, or in depths over eight or 10’ you can jig vertically if the wind and current allow for a moderate drifting speed. Either way, the key is to pop your jig up vigorously, then let it free-fall until it touches back down on bottom. Flounder will almost always strike just before the jig taps down and often you won’t realize it until you begin sweeping the rod tip up for the next hop. It will usually feel more or less like you’ve hooked bottom, and can be confusing at first, so when you swing that rod up swing it firmly and act as though any unusual feeling is a bona fide strike.
The What: A standard jighead paired up with a four- to six-inch soft plastic with a Fin-S-style split-tail work best. Paddletails and twisters will catch some fish, but for whatever reason for this specific tactic the straight body and split tail always seem to get more bites. Gulp! Jerk Shad (with the same type of tail) works exceptionally well, too. Every day is different but as a rule of thumb white is the top color pick, followed by chartreuse and pink. On cloudy days blue is sometimes a winner.
Trolling for Flounder
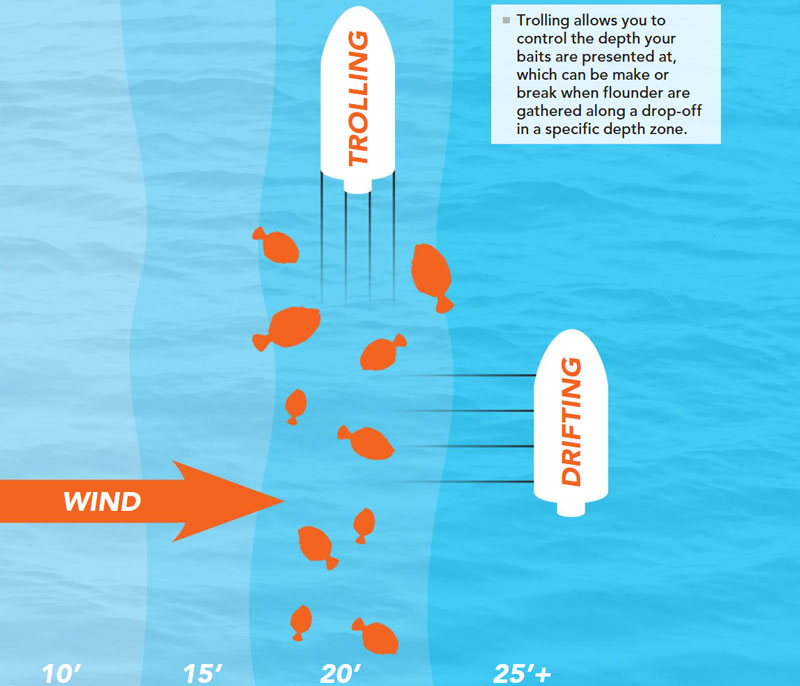
The Where and When: You can apply trolling to a wide range of scenarios, but where it really shines as compared to other techniques—blows them away, actually—is when the flatfish are gathered along the edge of sharp drop-offs in a specific depth range. Let’s say they’re concentrated in the 20’ range down along a drop-off from 10’ on down, for example. Unless the wind is blowing in the ideal direction, you’ll likely pass through the hot zone rapidly while drifting and will need to constantly reel up and reposition the boat. But trolling, you can work your way along the drop-off while keeping your baits at just the right depth. Since it’s very common for the bulk of the flounder on an edge to flock in a specific depth range with just five to 10’ of variation, trolling usually out-performs any other method in this scenario.
The How: Most successful flounder sharpies troll at super-slow speeds, often just a crawl. You can put rods in holders but you’ll get more bites if you hold the rod, and when using artificials, give it a sweep to jig the lure every few seconds. When using bait, it’s common to let the motion of the boat and the bait itself provide the action.
The What: You can troll the same top-and-bottom Fluke Killers as used when drifting and can also troll double bucktail rigs. Jigs can be used when the depth and current allow for it but in most times and places where trolling shines you’ll need five to eight ounces to hold bottom, and using a jig becomes impractical.
Are there other tactics you might apply to get a flounder on the line? Of course! Could a big storm and riled waters ruin the bite? Youbetcha. But as fall sets in and those flounder get ready to migrate you know they want to eat. And, we all know we’d like to catch ‘em.
BONUS FLOUNDER FISHING TIP: When using jigs it’s usually best to set the hook immediately upon the initial strike, but when using bait, you’ll need to give the fish a few seconds to eat. The first indication of a flounder biting bait is usually a jiggly, quivering sensation; strike now and it’s sure to be a whiff. Wait until you feel a series of thump-thump-thumps, indicating that the fish has taken the bait and is swimming away, before setting the hook.